You might be feeling the pinch when it comes to decorating your home, especially with window treatments. Let’s be honest: high-quality window coverings can cost a pretty penny. But just because you’re on a budget doesn’t mean you have to settle for boring or cheap-looking options. This post is here to show you that you can achieve a beautiful and custom look without breaking the bank.
If you’re someone who loves to personalize your space while keeping costs low, you’ve landed in the right spot. Whether you’re a DIY enthusiast or just looking for some budget-friendly home decor inspiration, these ideas will spark your creativity. With 12 unique and affordable window treatment projects, you’ll find solutions that enhance your home’s charm and reflect your personal style.
In this guide, you’ll discover various DIY window treatments that are stylish, practical, and incredibly cost-effective. From macramé magic to vintage lace panels, each idea brings a unique flair to your windows. You’ll learn how to transform simple materials into stunning decor pieces, making your home feel warm and inviting, all while staying within your budget.
Key Takeaways
– Explore 12 budget-friendly DIY project ideas for window treatments that add a custom touch without high costs.
– Learn how to use common materials like fabric, wood, and rope to create stylish window decor that matches your vibe.
– Discover no-sew options, perfect for those who want quick and easy solutions to refresh their space.
– Get tips on using reclaimed materials to embrace eco-friendly practices while saving money on window coverings.
– Enjoy creative projects like tie-dye curtains and flower garlands, adding a personal touch that makes your home uniquely yours.
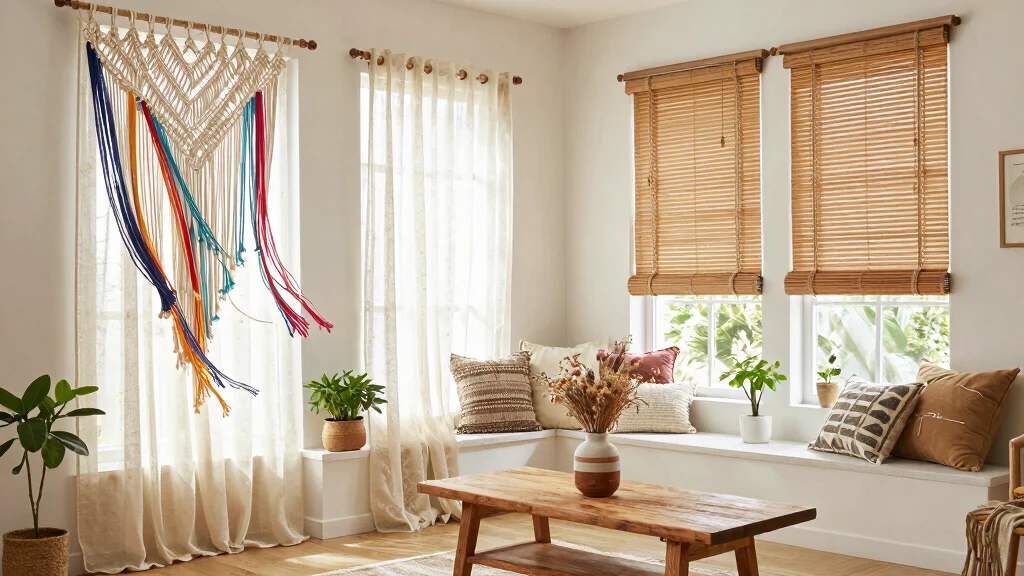
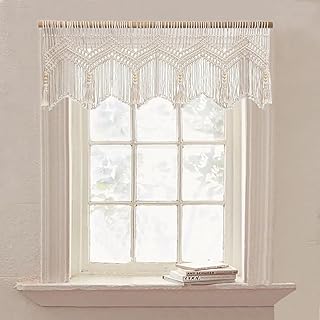
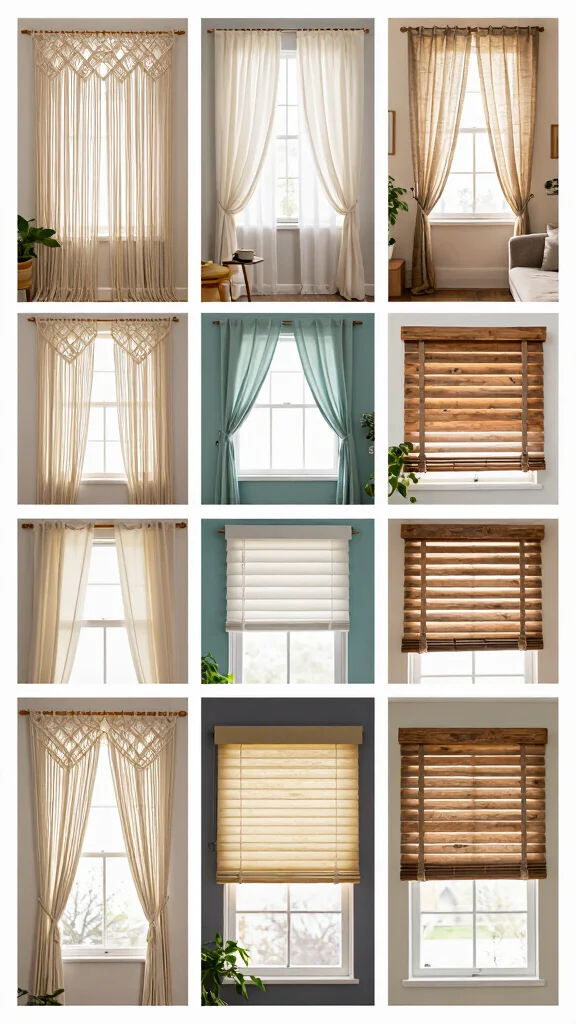
1. Macramé Magic
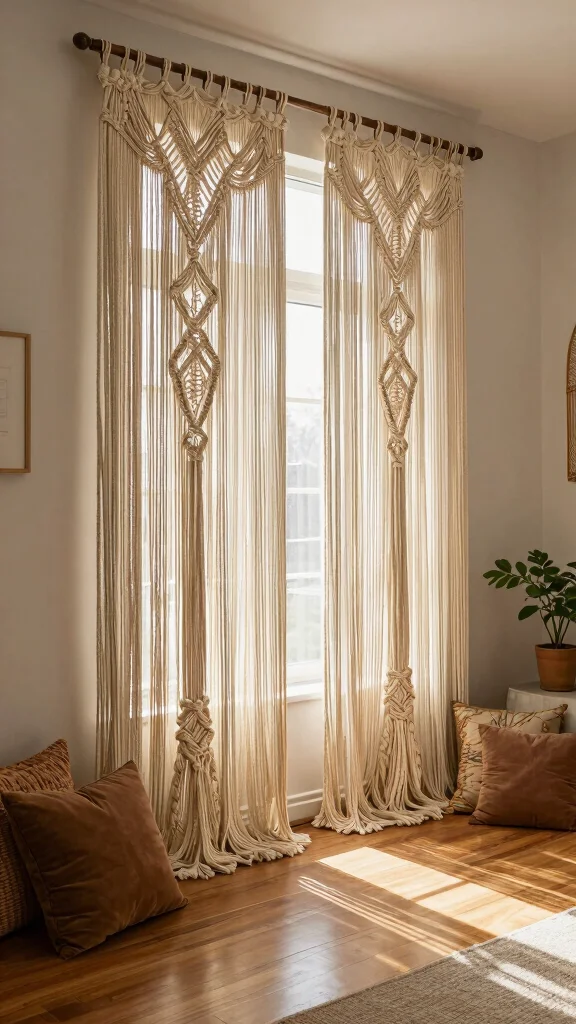
Embrace the resurgence of macramé, a captivating choice for window treatments that blends artistry with functionality. This design element works wonderfully because its intricate knots and patterns create visual interest and texture, making your space feel both inviting and stylish. You can use soft cotton cords to craft curtains that hang beautifully from a wooden dowel or a simple curtain rod, elevating your room with a bohemian touch. Consider pairing it with sheer curtains to filter light gently through the knots, enhancing the overall ambiance of your home.
To implement this look, think about layering different lengths of macramé for added dimension. You can easily find cotton cord at craft stores, making this project budget-friendly. This trend connects to the broader movement of incorporating natural fibers and handmade elements into home decor.
Maximize your macramé magic with these tips:
– Pair layered macramé curtains with light, sheer underlayers.
– Install a wooden dowel for a rustic presentation.
– Use contrasting colors for a bold statement.
– Incorporate macramé as a stylish room divider.
This enchanting project not only adds depth but also introduces unique textures that enhance your space’s overall aesthetic.
Fun fact: macramé curtains can cost under $20 to craft yourself, a win for window treatments diy cheap. Use soft cotton cords, a wooden dowel, and a few knots to tailor length and texture for any window—budget-friendly bohemian flair.
Macramé Magic
Editor’s Choice


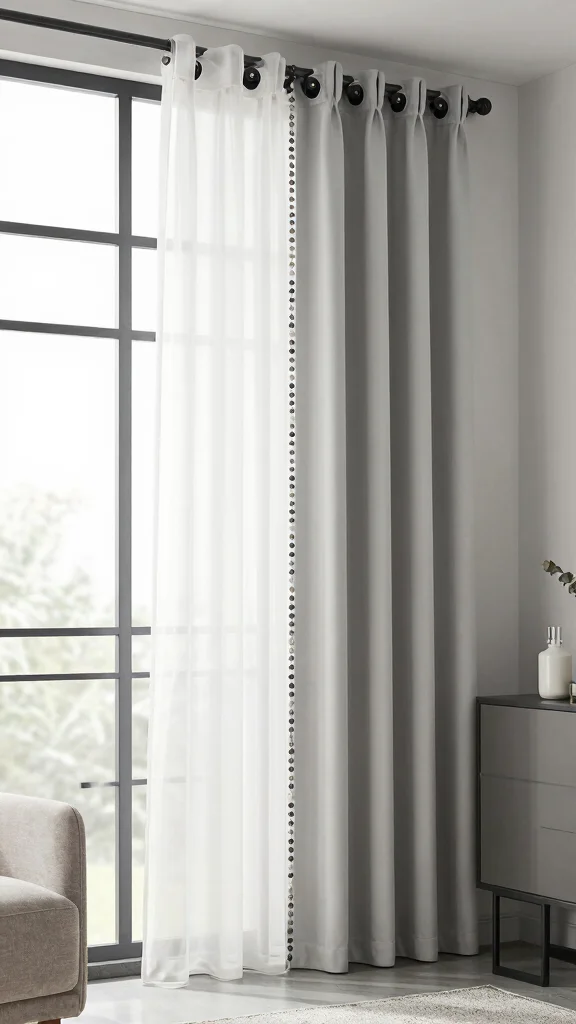
2. DIY Fabric Panels
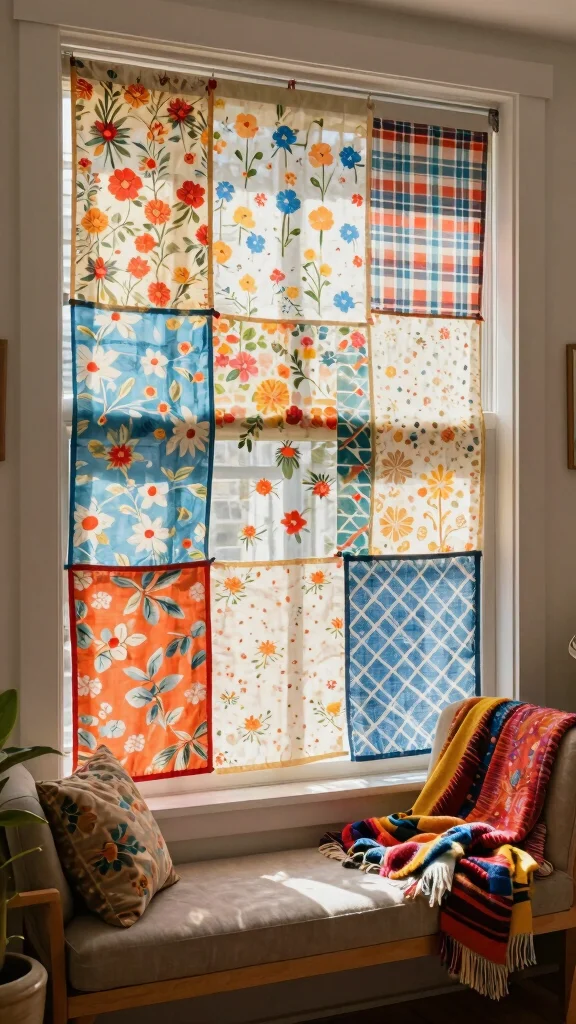
Fabric panels are a delightful way to inject color and personality into your windows. This approach works beautifully because it allows you to showcase bold patterns or soft hues that harmonize with your existing decor, instantly refreshing your space. Simply hem the edges of your chosen fabric or use iron-on tape for a quick finish, then hang them with clip rings or adhesive hooks for an effortless installation.
To make the most of this idea, consider rotating fabrics with the seasons for a fresh look year-round. You can source fabric remnants at local fabric stores or online, ensuring your project stays within budget. This method connects to the growing trend of personalizing home spaces through adaptable decor.
Get started with these actionable tips:
– Use varying lengths of fabric for an eye-catching asymmetrical design.
– Mix and match patterns for a playful patchwork effect.
– Experiment with seasonal fabrics for easy updates.
This technique offers endless customization, allowing you to express your creativity without overspending.
Fun fact: DIY fabric panels can cut window treatments diy cheap by up to 60% and refresh a room in under an hour. A quick hem or iron-on tape, plus clip rings, makes a custom look achievable on a budget.
3. Reclaimed Wood Blinds
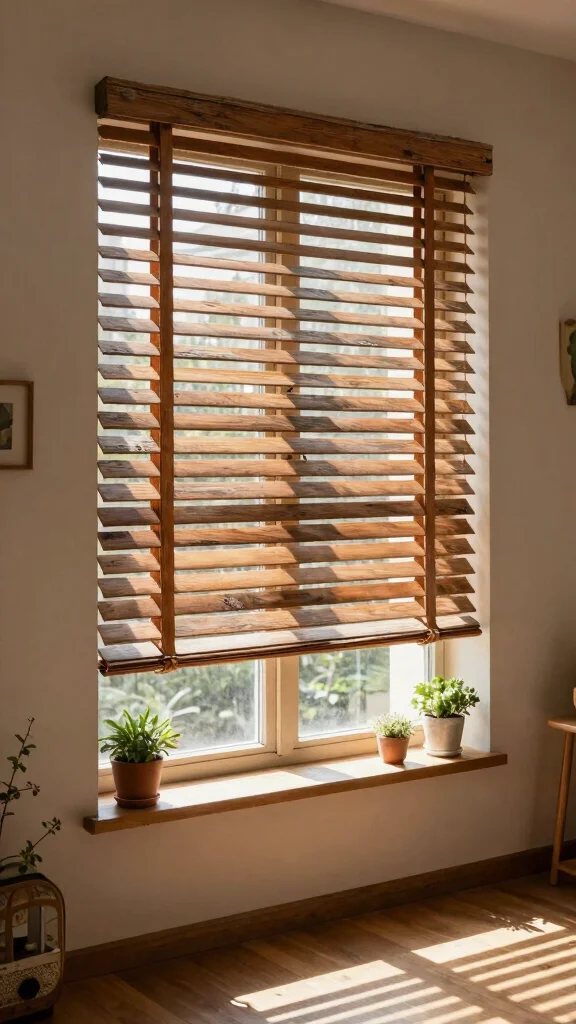
Transform your windows with the rustic charm of reclaimed wood blinds. This option stands out because it brings warmth and character to your space, making it feel inviting and unique. You can source reclaimed wood from local hardware stores or salvage yards, cutting the pieces to size and sanding them for a smooth finish before hanging on a curtain rod.
To enhance this look, consider staining the wood for depth, or leave it in its natural state for a minimalist vibe. Pairing these blinds with sheer curtains creates a beautifully layered effect that softens the overall appearance. This sustainable choice connects to the trend of eco-friendly decor and unique handmade items.
Try these ideas to create your own wood blinds:
– Stain the wood for a rich, aged finish.
– Install sheer curtains underneath for a layered look.
– Use rustic hardware like wrought iron for added charm.
This approach not only saves money but also introduces stunning textures that make your home feel cozy and inviting.
Reclaimed Wood Blinds
Editor’s Choice


4. Painted Canvas Curtains

Get creative by painting your own canvas curtains for a truly personalized touch. This project is exciting because it allows you to express your artistic flair while enhancing your window treatments with unique designs. Start with plain white canvas fabric and use fabric paint to create anything from geometric patterns to playful florals, bringing your vision to life.
Before painting, wash and dry the fabric to ensure the paint adheres properly. Using stencils can help achieve precise designs, or you can freehand for a more whimsical effect. This DIY project fits perfectly with the trend of handmade decor and adds a personal dimension to your home.
Follow these steps to create your painted curtains:
– Prepare the fabric by washing and drying it.
– Use stencils for clean, clear patterns.
– Allow the paint to dry completely before hanging.
This fun project not only enhances your windows but also showcases your creativity, providing a unique focal point in your space.
🏡 Transform Your Space Like a Pro
Unlock the secrets to beautiful, budget-friendly home decor with our comprehensive DIY guide for stunning makeovers.
5. Rope and Beads Accents
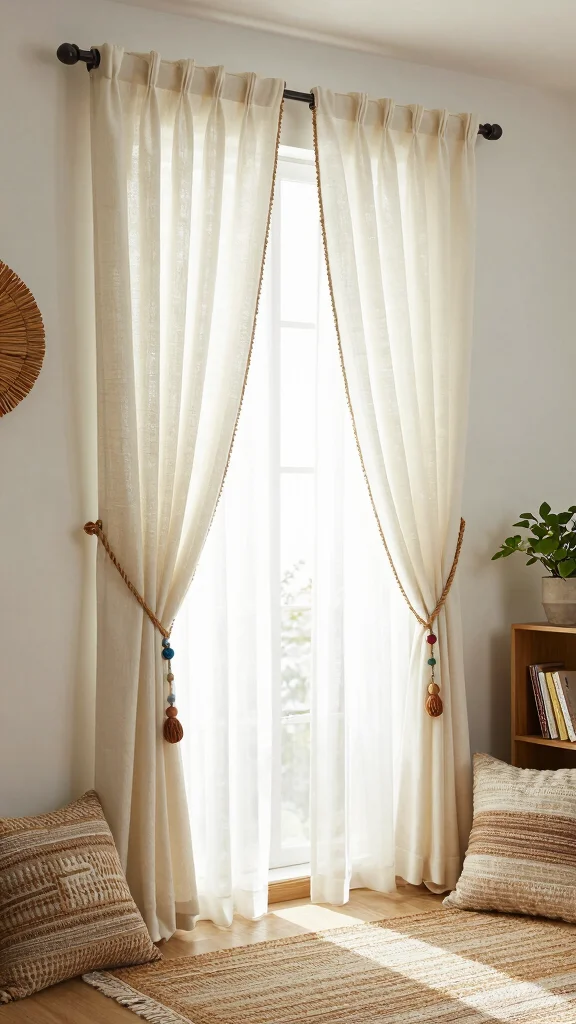
Add a delightful touch of texture to your window treatments with rope and beads! This creative idea stands out because it introduces a bohemian vibe to your curtains with minimal effort. You can easily create a simple tieback using lengths of rope, tying it around your curtains to keep them elegantly drawn back.
To add flair, thread decorative beads onto the rope before knotting, or use leftover fabric to craft charming tassels. This project is budget-friendly and requires very few materials, making it accessible for anyone looking to elevate their decor.
Consider these tips to enhance your window treatments:
– Cut rope to desired lengths for custom tiebacks.
– Thread beads to add color and interest.
– Create fabric tassels for a playful finish.
This simple yet effective project keeps your decor casual while infusing it with chic, bohemian charm.
Fun fact: a simple rope tieback with bead accents can elevate window treatments diy cheap—no pro needed. In under 15 minutes, you can add tassels and beads for a bohemian vibe, while keeping costs under $5. Small details, big impact.
Rope and Beads Accents
Editor’s Choice


6. Flower Garland Frames
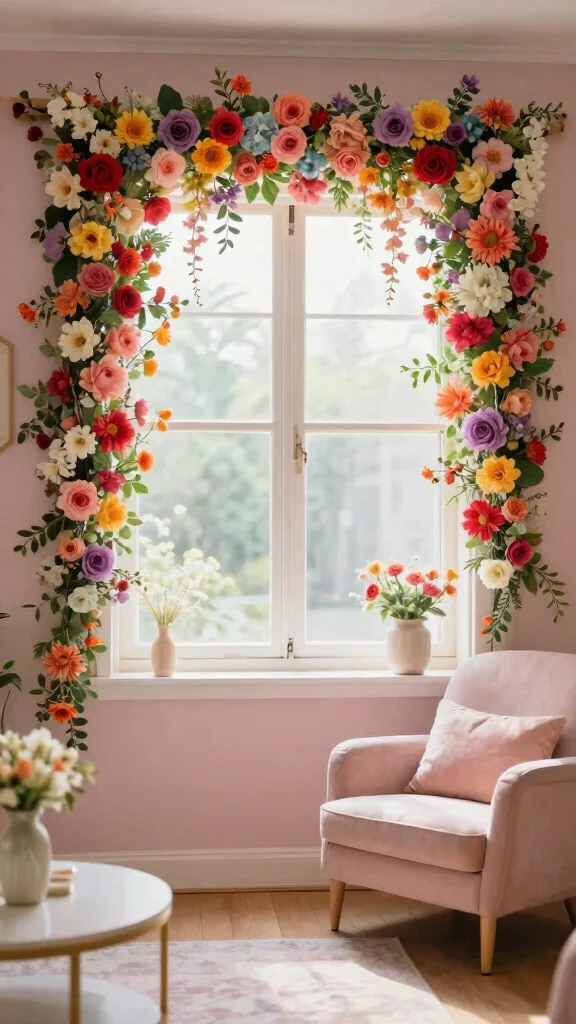
Bring the beauty of nature indoors with a charming flower garland framing your window. This delightful project adds a whimsical touch and vibrant color to any room, making it a fantastic focal point. You can use faux or dried flowers tied to twine or string, creating a lovely garland that hangs gracefully above your window.
To get started, simply tie flowers at regular intervals along the twine for an eye-catching arrangement. This project is a wonderful way to incorporate seasonal blooms, reflecting your love for nature in your decor. Flower garlands are also a nod to the trend of utilizing organic elements in home design.
Here’s how to create your flower garland:
– Gather faux or dried flowers for durability.
– Tie flowers to twine at regular intervals.
– Hang the garland above your window for a playful look.
This project not only serves as a beautiful window treatment but also sparks conversation and showcases your creativity.
You might also like
7. Vintage Lace Panels
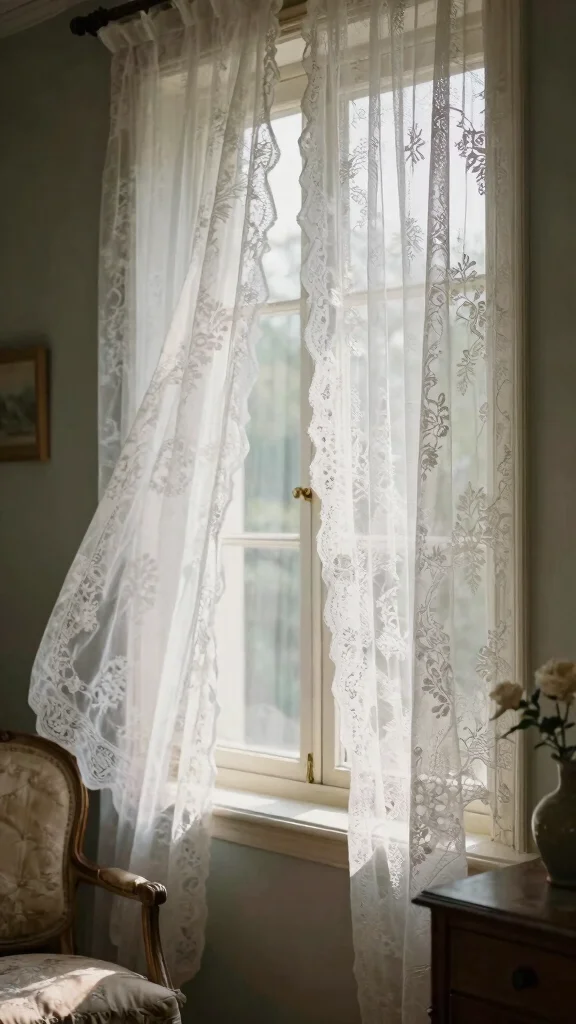
Elevate your windows with the timeless elegance of vintage lace. This classic element brings romance and charm to your space, making it a lovely choice for window treatments. You can repurpose old lace tablecloths or curtains, cutting them to fit your windows and hanging them with curtain clips for an effortless look.
Layering lace over solid curtains not only adds privacy but also maintains an airy feel, allowing light to filter beautifully through. You can find vintage lace at thrift stores or garage sales, making this option both budget-friendly and sustainable.
Consider these tips for creating your lace panels:
– Cut lace to fit your window dimensions.
– Use curtain clips for easy hanging.
– Layer over solid curtains for a soft, romantic finish.
This enchanting approach creates an ethereal aesthetic that enhances any room with a touch of vintage charm.
Difficulty Rating & Requirements
Overall Difficulty Rating: Medium
Creating DIY window treatments can be a fun and rewarding project, but it does carry a moderate level of difficulty. These projects require some basic crafting skills and a bit of patience, making them suitable for individuals with at least some experience in home decor or DIY tasks. If you enjoy hands-on activities and have a creative mindset, you will likely find these projects enjoyable.
Time Estimate:
⏱ Estimated time: 3-5 hours
– Planning & Design: 1 hour to gather ideas and measure your windows.
– Shopping for Materials: 1-2 hours depending on your local stores.
– Crafting: 1-2 hours to create your window treatments.
– Installation: 30 minutes to hang and adjust your new decor.
Skill Requirements:
– Required skills: Basic sewing, measuring, and crafting skills.
– Beginner-friendly: Yes, with guidance. Many of these projects involve straightforward techniques that beginners can learn quickly. Some skills, like sewing or cutting wood, may require a bit of practice, but you can always start with no-sew options.
– Skills that can be learned include sewing straight lines, using a hot glue gun, and cutting fabric or wood. Skills like advanced sewing or woodworking may require prior experience.
Tools & Materials Needed:
🧰 Essential items checklist:
– Fabric (required) – Choose colorful or patterned fabric for your curtains.
– Sewing machine or needle and thread (required) – Needed for DIY curtains, but optional for no-sew options.
– Hot glue gun (required) – This tool is perfect for no-sew projects and quick fixes.
– Measuring tape (required) – Essential for measuring your windows accurately.
– Wood or dowels (optional) – Great for adding rustic charm to your window treatments.
– Scissors (required) – A good pair of fabric scissors is a must.
– Decorative elements (optional) – Items like beads, rope, or lace can enhance the look of your treatments.
Step-by-Step Overview:
1. Planning & Design (1 hour) – Start by deciding what style you want. Measure your windows and sketch your ideas. Choose your materials based on the style you prefer.
2. Shopping for Materials (1-2 hours) – Go to your local craft store or shop online for the materials you need. Consider budget-friendly options or second-hand finds.
3. Crafting (1-2 hours) – Follow your chosen design, whether it’s sewing, gluing, or assembling. Take your time to ensure quality.
4. Installation (30 minutes) – Use your measuring tape to find the perfect height for your new window treatments. Hang and adjust to your liking.
Professional vs DIY:
Professional Cost: Hiring a professional can cost anywhere from $100 to $500 per window, depending on the complexity and materials.
DIY Cost: You can likely complete a DIY window treatment for as little as $20 to $100, depending on materials chosen, and the satisfaction of doing it yourself.
If you have a specific style in mind and enjoy crafting, consider tackling this project on your own. However, if you’re not confident in your skills or time, hiring a professional could be the better route.
8. Branch Rods
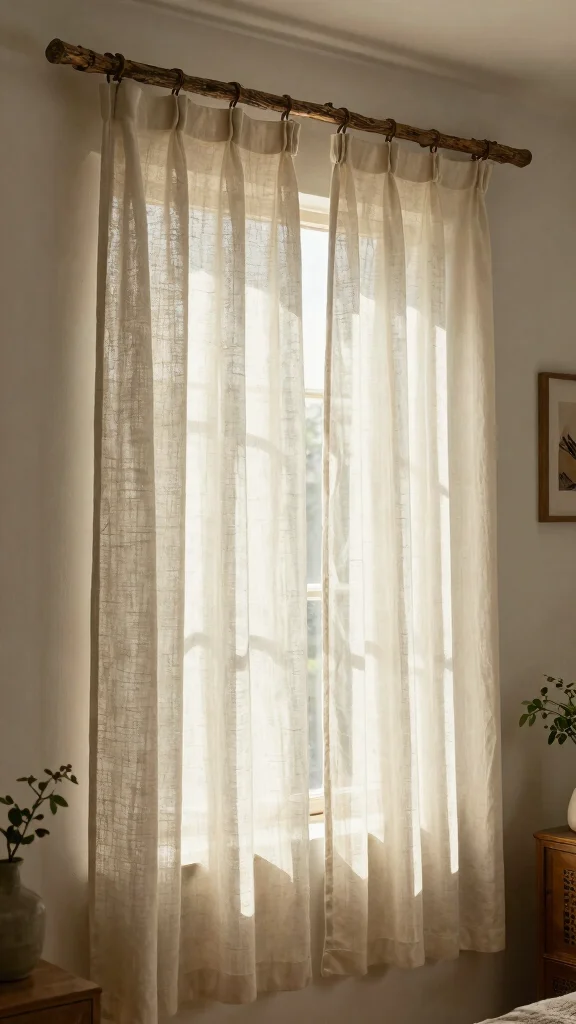
For a truly unique window treatment, consider using natural branches as curtain rods. This rustic idea adds an organic touch to your decor and is simple to execute. Start by finding sturdy branches that fit your window’s width, then sand them down for a smooth finish.
Attach curtain clips to hang your fabric from the branches, creating a natural yet stylish display. You can paint the branches to match your decor or leave them unadorned for a more earthy feel. This approach ties into the trend of incorporating natural elements into home design.
Try these ideas for your branch rods:
– Sand branches for a polished look.
– Paint branches for a pop of color.
– Pair with lightweight curtains for an airy effect.
This creative approach not only looks stunning but also brings the beauty of nature indoors.
Branch Rods
Editor’s Choice


9. Easy No-Sew Curtains
Short on time? No problem! You can create beautiful curtains without sewing a single stitch. This method is perfect for busy lifestyles, allowing you to refresh your windows quickly and easily. Simply purchase your favorite fabric, cut it to fit your window, and finish the edges using iron-on hem tape for a seamless look.
For a quick setup, hang your no-sew curtains using tension rods or clip rings. Experimenting with different textures, like velvet or linen, can elevate your design and create a layered effect. This option aligns with the trend of effortless, stylish home updates.
Follow these steps for your no-sew curtains:
– Cut fabric to your desired window size.
– Use iron-on tape to finish the edges.
– Hang using tension rods for easy installation.
This project not only saves you time but also allows for easy updates whenever you want a new look.
10. Tie-Dye Window Treatments
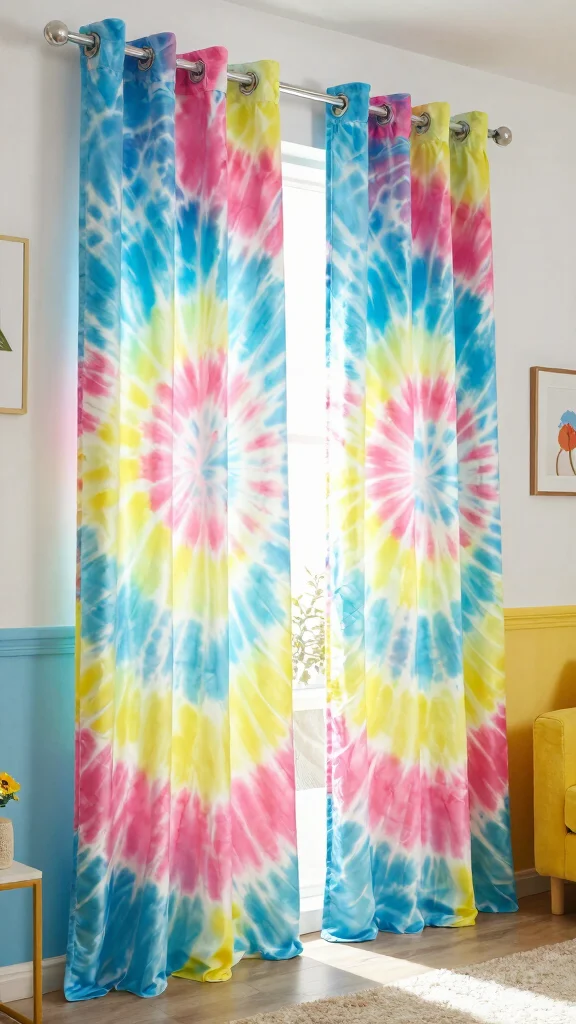
Unleash your creativity with tie-dye window treatments! This fun project allows you to add colorful designs to plain curtains, bringing a joyful energy to your space. Start with white curtains and a tie-dye kit, twisting or folding the fabric to create unique patterns before applying the dye.
Once your curtains are dyed, rinse and hang them to dry, showcasing your artistic flair. This activity is not only budget-friendly but also a fantastic way to involve your family in a creative project. Tie-dyeing connects with the trend of personalized home decor, making your space truly yours.
Here’s how to get started with tie-dye curtains:
– Gather white curtains and a dye kit.
– Twist or fold fabric for varied patterns.
– Rinse and hang to dry before displaying.
This playful project results in one-of-a-kind window treatments that add a vibrant touch to your home.
Tie-Dye Window Treatments
Editor’s Choice


11. Magnetic Curtain Holdbacks
Introduce a modern flair to your window treatments with stylish magnetic curtain holdbacks. This innovative idea allows you to hold your curtains back elegantly while adding a unique design element to your space. You can create these holdbacks using simple materials like fabric, beads, and magnets, making them both affordable and easy to make.
To craft your magnetic holdbacks, cut strips of fabric, attach magnets to each end, and embellish with decorative beads for added charm. This project is quick to assemble, perfect for those seeking a chic update without the hassle. This trend highlights the joy of DIY and personal touches in home decor.
Try these tips for your magnetic holdbacks:
– Cut fabric strips to your preferred length.
– Sew or glue magnets to each end for functionality.
– Add beads for a decorative touch.
This simple yet effective project enhances your window treatments while making a stylish statement.
12. Simple Blinds from Paper
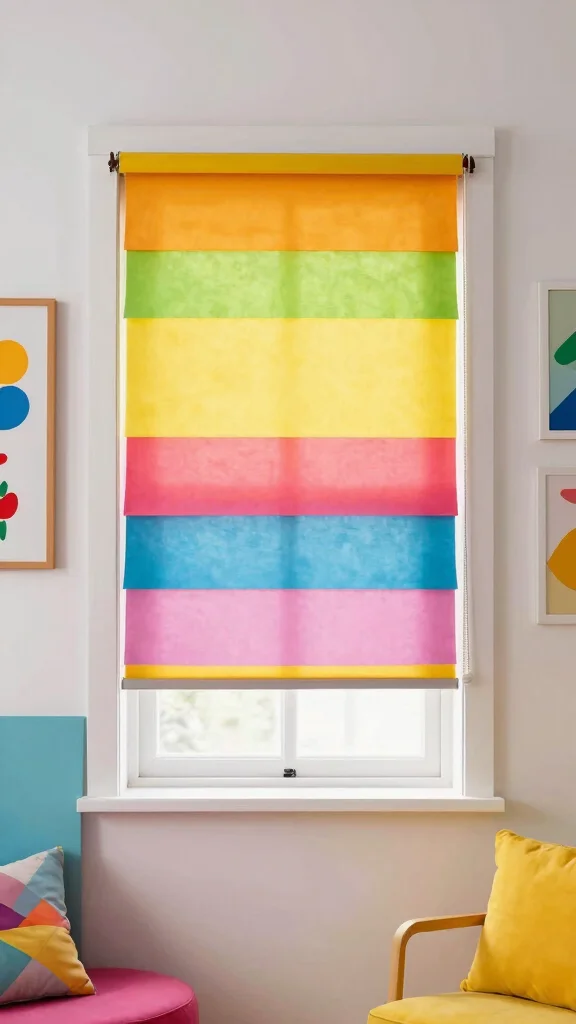
Explore the charm of paper blinds, a fantastic solution for stylish yet temporary window treatments. This budget-friendly option works beautifully, offering a fun and whimsical appeal without breaking the bank. You can create simple blinds by cutting cardstock or craft paper to fit your windows, ensuring even lengths for a polished look.
Using adhesive strips, hang the paper directly on your window frame for a quick and easy setup. Consider mixing different colors or patterns for a playful layered effect, perfect for kids’ rooms or seasonal decor changes. This project aligns with the trend of incorporating creative, temporary solutions into home design.
Follow these instructions for your paper blinds:
– Cut paper to fit your window dimensions.
– Use adhesive strips for easy hanging.
– Experiment with different papers for a fun layered look.
This project is simple to customize, adding a playful touch to your space without a hefty investment.
Conclusion
With these 12 inexpensive DIY window treatment ideas, you can easily elevate your space without spending a fortune.
These projects not only reflect your personal style but also bring warmth and character to your home. Whether you prefer bohemian, rustic, or modern aesthetics, there’s something here for everyone.
Get started on your DIY journey today, and let your creativity shine!
Note: We aim to provide accurate product links, but some may occasionally expire or become unavailable. If this happens, please search directly on Amazon for the product or a suitable alternative.
This post contains Amazon affiliate links, meaning we may earn a small commission if you purchase through our links, at no extra cost to you.
Frequently Asked Questions
What are some cheap DIY window treatment ideas that still look custom?
There are plenty of budget-friendly options that read as custom. Start with a simple, affordable base like drop cloths, thrifted curtains, or cotton sheeting, then tailor them with color, dye, trim, or paint to create a unique look. Creative window treatment projects you can try include: 1) no-sew fabric panels using fusible tape or fabric glue; 2) layering a sheer panel under a solid drape for depth and light control; 3) a small wooden cornice or valance made from reclaimed boards for a high-end silhouette; 4) boho details like macrame tiebacks or fringe; 5) bold prints from inexpensive cottons to add personality. Quick tips: measure accurately, prewash fabrics, and hang with inexpensive rings or clips for a polished finish. This is a great way to do window treatments diy cheap while keeping affordable window decor in mind.
How can I achieve a budget-friendly Bohemian window treatment that feels high-end?
Focus on layering texture and natural materials. Start with a neutral base (creamy, sandy tones) and add depth with a sheer panel plus a textured panel, a woven valance, and tassel or fringe accents. Use affordable fabrics like cotton, jute, or thrifted curtains and mix patterns sparingly to avoid visual overload. Create a cohesive Bohemian vibe by selecting a harmonious color palette and incorporating handmade touches like a DIY tassel garland or macrame cord accents. With a few well-chosen pieces, you can get a budget-friendly window solution that looks thoughtfully curated and stylish.
What materials and supplies do I need for affordable window decor on a budget?
Here’s a practical starter list for affordable window decor: budget-friendly base fabric (drop cloths, thrifted curtains, or cotton sheeting), a simple curtain rod or tension rod, rings or clips, scissors, a measuring tape, and a sewing option (sewing machine) or fusible fabric tape for no-sew edges. Add lining or blackout liner if you want more privacy or light control. Optional extras include grommets, tassels, fringe, or macrame cord for boho texture. This setup keeps things cheap while allowing for creative window treatment projects that still feel custom.
Can I get privacy and light control with inexpensive window covering ideas?
Absolutely. Try layering for both privacy and light control: pair a sheer panel with a heavier, lined panel to balance light diffusion and coverage. For a budget-friendly solution, add a DIY blackout liner to inexpensive curtains, or use two panels that overlap for better privacy. If you want even more control, consider a light-blocking liner or a DIY bamboo shade layered under fabric panels. These inexpensive window covering ideas let you tailor brightness and privacy without breaking the bank.
How can I install DIY curtains on a budget without professional help?
Installation can be quick and inexpensive. Steps: 1) measure your window and decide rod length; 2) choose a mounting method—screw-in brackets for stability or a tension rod for a no-drill option; 3) install brackets or set up the tension rod; 4) hem or finish edges (no-sew options exist with fusible tape); 5) hang panels using rings, clips, or standard rod pockets. For no-drill methods, reinforce with adhesive hooks and removable cord supports. With basic tools and a little patience, you can achieve a polished look that fits budget-friendly window solutions and keeps the DIY spirit alive.
Related Topics
home decor
window treatments diy cheap
budget-friendly
bohemian style
inexpensive decor
DIY curtains
affordable window solutions
creative projects
easy home updates
beginner friendly
custom look
seasonal decor